# Vite项目下的Vue组件HMR的过程
# 1、前言
我没有详细的了解过webpack中Vue组件的HMR过程,因此本文只做学习理解,不做和webpack的对比。
在开始阅读此文之前,请确保你已经使用过vite,并且对vite的一些特性已经有一些了解了。
本文将从源码的角度结合vite生态链所提供的文档阐述。为了方便您的理解,我将以先分析组件侧所完成的工作,再分析构建工具侧完成的工作的顺序,依次分析这些框架或工具中所负责的功能。
我将使用vite官方文档提供的创建vue项目的方式进行阐述,有条件的同学可以根据我的博客进行实操。
# 2、准备工作
首先使用以下命令,初始化一个 vite 的项目:
pnpm create vite hmr-example --template vue
为了方便查看vite对.vue进行了怎么样的转换,我们还需要安装 antfu 大佬编写的插件:
pnpm i vite-plugin-inspect -D
并且在我们刚才创建的vite项目中引入:
import { defineConfig } from "vite";
import vue from "@vitejs/plugin-vue";
import inspect from "vite-plugin-inspect";

// https://vitejs.dev/config/
export default defineConfig({
  plugins: [vue(), inspect()],
})``;
然后我们再将项目启动起来,控制台就会多出一个 debug 的地址,打开它。
http://127.0.0.1:5173/__inspect/
# 3、原理分析
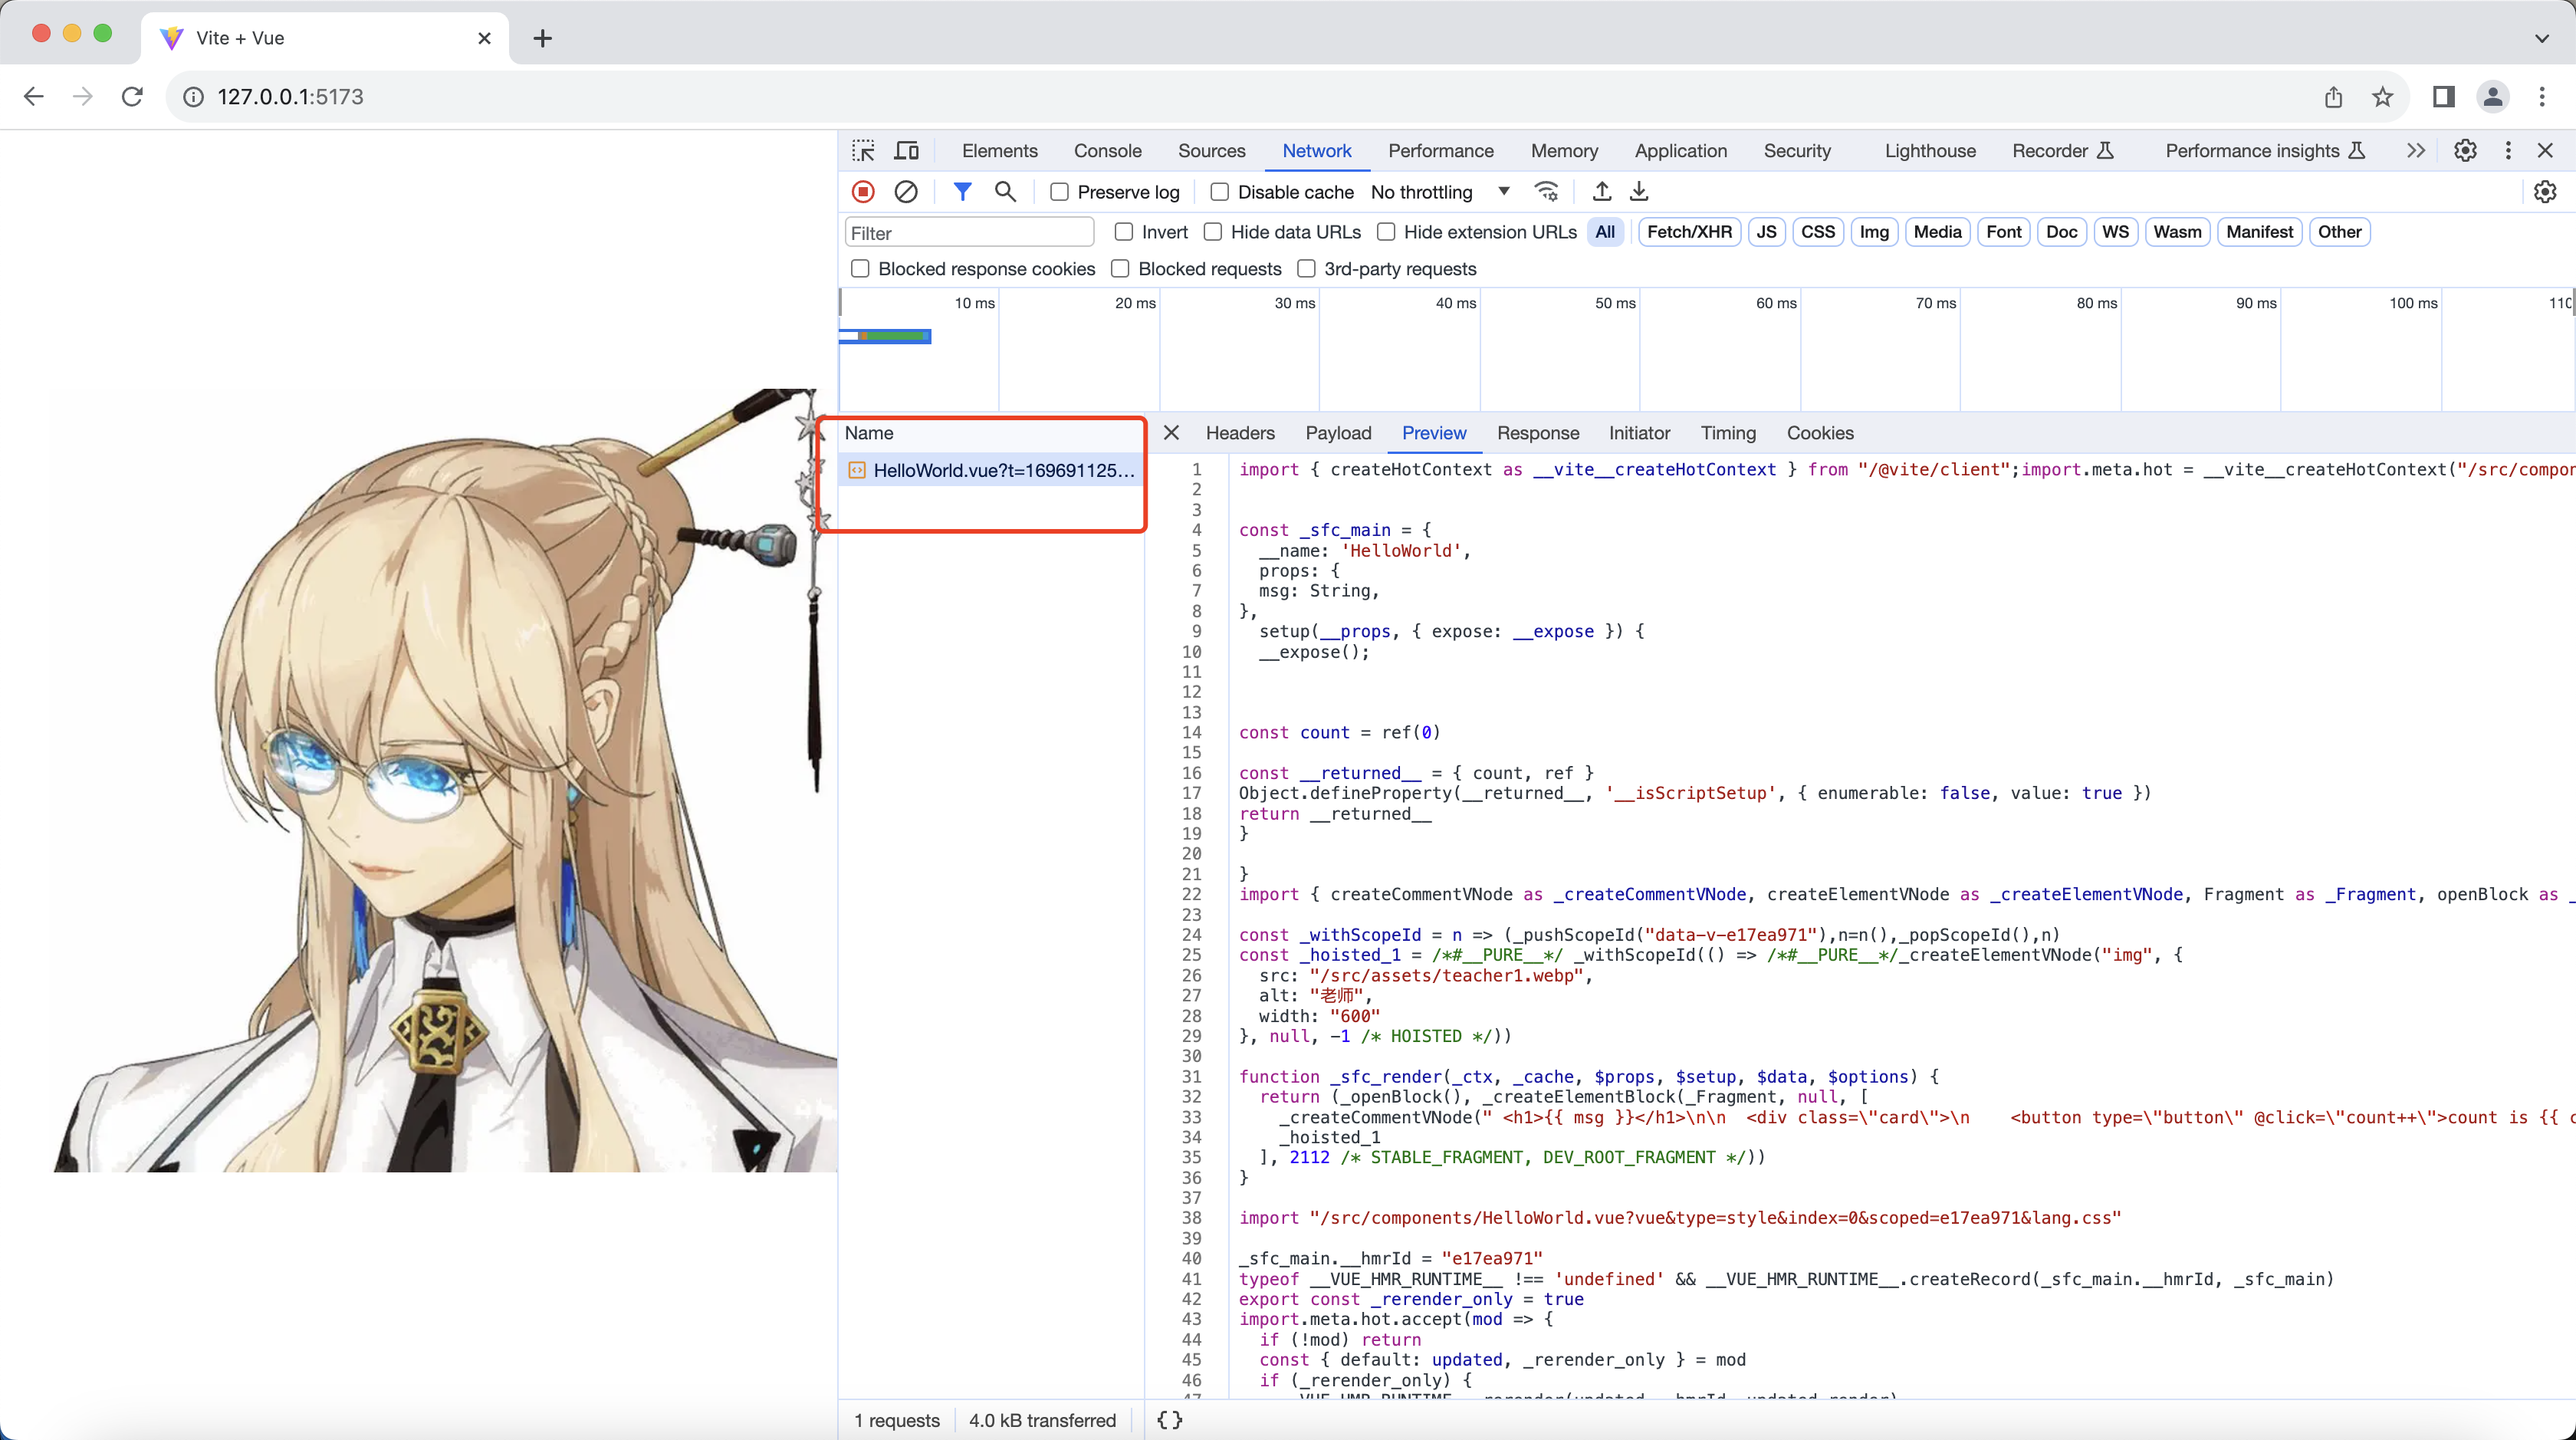
因为我的代码是编写在HelloWorld.vue中的,所以我打开了如图所示是窗口:

在这个图中,以下是比较关键的部分,在我截的上图位置,大概是第 54 行到 63 行。
typeof __VUE_HMR_RUNTIME__ !== "undefined" &&
  __VUE_HMR_RUNTIME__.createRecord(_sfc_main.__hmrId, _sfc_main);
import.meta.hot.accept((mod) => {
  if (!mod) return;
  const { default: updated, _rerender_only } = mod;
  if (_rerender_only) {
    __VUE_HMR_RUNTIME__.rerender(updated.__hmrId, updated.render);
  } else {
    __VUE_HMR_RUNTIME__.reload(updated.__hmrId, updated);
  }
});
现在,先插播一条知识点:
这段代码,我们假设import.meta.hot如果已经存在的话,这个操作其实就是在挂载回调函数,但是import.meta.hot肯定不是凭空出现的,它是哪儿来的呢?它是由vite的Client注入的。(源码在这个位置 (opens new window))
为了方便你的阅读,代码太多,我只能节选关键的代码,如下:
// inject hot context
str().prepend(
  `import { createHotContext as __vite__createHotContext } from "${clientPublicPath}";` +
    `import.meta.hot = __vite__createHotContext(${JSON.stringify(
      normalizeHmrUrl(importerModule.url),
    )});`,
)
然后我们再看回来,首先,我们看这段代码,大概能得出一个结论,Vue记住了某个组件的哈希值,当新的文件变更来临的时候,根据条件实现重新渲染还是刷新。
这段代码是怎么来的呢?这段代码是@vitejs/vue-plugin编译vue文件注入的。(源码位于这个位置 (opens new window))
为了方便你的阅读,以下是我节选的关键代码:
export async function transformMain(
  code: string,
  filename: string,
  options: ResolvedOptions,
  pluginContext: TransformPluginContext,
  ssr: boolean,
  asCustomElement: boolean
) {
  const { devServer, isProduction, devToolsEnabled } = options;

  const prevDescriptor = getPrevDescriptor(filename);
  const { descriptor, errors } = createDescriptor(filename, code, options);

  // feature information
  const attachedProps: [string, string][] = [];
  const hasScoped = descriptor.styles.some((s) => s.scoped);

  // script
  const { code: scriptCode, map: scriptMap } = await genScriptCode(
    descriptor,
    options,
    pluginContext,
    ssr
  );

  // template
  const hasTemplateImport =
    descriptor.template && !isUseInlineTemplate(descriptor, !devServer);

  let templateCode = "";
  let templateMap: RawSourceMap | undefined = undefined;
  if (hasTemplateImport) {
    ({ code: templateCode, map: templateMap } = await genTemplateCode(
      descriptor,
      options,
      pluginContext,
      ssr
    ));
  }

  // styles
  const stylesCode = await genStyleCode(
    descriptor,
    pluginContext,
    asCustomElement,
    attachedProps
  );

  const output: string[] = [
    scriptCode,
    templateCode,
    stylesCode,
    customBlocksCode,
  ];

  // ——————————————已经删除一些不相关的代码——————————————

  // HMR
  if (
    devServer &&
    devServer.config.server.hmr !== false &&
    !ssr &&
    !isProduction
  ) {
    output.push(`_sfc_main.__hmrId = ${JSON.stringify(descriptor.id)}`);
    output.push(
      `typeof __VUE_HMR_RUNTIME__ !== 'undefined' && ` +
        `__VUE_HMR_RUNTIME__.createRecord(_sfc_main.__hmrId, _sfc_main)`
    );
    // check if the template is the only thing that changed
    if (prevDescriptor && isOnlyTemplateChanged(prevDescriptor, descriptor)) {
      output.push(`export const _rerender_only = true`);
    }
    output.push(
      `import.meta.hot.accept(mod => {`,
      `  if (!mod) return`,
      `  const { default: updated, _rerender_only } = mod`,
      `  if (_rerender_only) {`,
      `    __VUE_HMR_RUNTIME__.rerender(updated.__hmrId, updated.render)`,
      `  } else {`,
      `    __VUE_HMR_RUNTIME__.reload(updated.__hmrId, updated)`,
      `  }`,
      `})`
    );
  }

  // ——————————————已经删除一些不相关的代码——————————————

  return {
    code: resolvedCode,
    map: resolvedMap || {
      mappings: "",
    },
    meta: {
      vite: {
        lang: descriptor.script?.lang || descriptor.scriptSetup?.lang || "js",
      },
    },
  };
}
以上代码我们可以得出结论@vitejs/vue-plugin在转换vue文件的时候,不仅会处理template,script, style,还附加上热更新相关的逻辑,使得Vue的运行时将来在合适的时间能调用这个附加的更新逻辑。
顺着这个逻辑,我们就不禁发问:__VUE_HMR_RUNTIME__这个东西是什么?它来源于哪儿?出于程序员的职业素养,我们肯定要尝试去搜索这个东西是不是Vue本身提供的能力。
于是,我们找到Vue的仓库,去搜一下这个__VUE_HMR_RUNTIME__这个东西在哪儿。
别说,还真的一下子就被我们找到了:在这个位置 (opens new window)
我们可以清楚的看到,vue在DEV阶段给我们定义了三个方法,虽然是被tryWrap包裹着的,不过掐指一算,这肯定只是框架统一处理的错误捕获方法,对我们分析其原理并无影响(体现出了框架设计者严谨的代码风格,这就是我们为什么要学习源码的理由)
// Expose the HMR runtime on the global object
// This makes it entirely tree-shakable without polluting the exports and makes
// it easier to be used in toolings like vue-loader
// Note: for a component to be eligible for HMR it also needs the __hmrId option
// to be set so that its instances can be registered / removed.
if (__DEV__) {
  getGlobalThis().__VUE_HMR_RUNTIME__ = {
    createRecord: tryWrap(createRecord),
    rerender: tryWrap(rerender),
    reload: tryWrap(reload),
  } as HMRRuntime;
}
另外,为什么这一大段代码会被__DEV__这个环境变量包裹起来呢?因为这段代码只会在我们开发的时候用到,但是在生产环境不会用到,在构建的时候,__DEV__直接被替换为false,构建工具发现这是一个永远不会执行的逻辑,于是就tree-shaking掉了,有助于减少代码库的体积。(后续的代码也是这个思路)
所以,重点还是回到createRecord,rerender,reload这三个方法上来,看看他们分别做了什么。
为了方便你的阅读,我复制了这三个函数及一些关键代码。
createRecord:
function normalizeClassComponent(component: HMRComponent): ComponentOptions {
  return isClassComponent(component) ? component.__vccOpts : component;
}

function createRecord(id: string, initialDef: HMRComponent): boolean {
  if (map.has(id)) {
    return false;
  }
  map.set(id, {
    initialDef: normalizeClassComponent(initialDef),
    instances: new Set(),
  });
  return true;
}
rerender:
function rerender(id: string, newRender?: Function) {
  const record = map.get(id);
  if (!record) {
    return;
  }

  // update initial record (for not-yet-rendered component)
  record.initialDef.render = newRender;

  // Create a snapshot which avoids the set being mutated during updates
  [...record.instances].forEach((instance) => {
    if (newRender) {
      instance.render = newRender as InternalRenderFunction;
      normalizeClassComponent(instance.type as HMRComponent).render = newRender;
    }
    instance.renderCache = [];
    // this flag forces child components with slot content to update
    isHmrUpdating = true;
    instance.update();
    isHmrUpdating = false;
  });
}
reload:
function updateComponentDef(
  oldComp: ComponentOptions,
  newComp: ComponentOptions
) {
  extend(oldComp, newComp);
  for (const key in oldComp) {
    if (key !== "__file" && !(key in newComp)) {
      delete oldComp[key];
    }
  }
}

function reload(id: string, newComp: HMRComponent) {
  const record = map.get(id);
  if (!record) return;

  newComp = normalizeClassComponent(newComp);
  // update initial def (for not-yet-rendered components)
  updateComponentDef(record.initialDef, newComp);

  // create a snapshot which avoids the set being mutated during updates
  const instances = [...record.instances];

  for (const instance of instances) {
    const oldComp = normalizeClassComponent(instance.type as HMRComponent);

    if (!hmrDirtyComponents.has(oldComp)) {
      // 1. Update existing comp definition to match new one
      if (oldComp !== record.initialDef) {
        updateComponentDef(oldComp, newComp);
      }
      // 2. mark definition dirty. This forces the renderer to replace the
      // component on patch.
      hmrDirtyComponents.add(oldComp);
    }

    // 3. invalidate options resolution cache
    instance.appContext.propsCache.delete(instance.type as any);
    instance.appContext.emitsCache.delete(instance.type as any);
    instance.appContext.optionsCache.delete(instance.type as any);

    // 4. actually update
    if (instance.ceReload) {
      // custom element
      hmrDirtyComponents.add(oldComp);
      instance.ceReload((newComp as any).styles);
      hmrDirtyComponents.delete(oldComp);
    } else if (instance.parent) {
      // 4. Force the parent instance to re-render. This will cause all updated
      // components to be unmounted and re-mounted. Queue the update so that we
      // don't end up forcing the same parent to re-render multiple times.
      queueJob(instance.parent.update);
    } else if (instance.appContext.reload) {
      // root instance mounted via createApp() has a reload method
      instance.appContext.reload();
    } else if (typeof window !== "undefined") {
      // root instance inside tree created via raw render(). Force reload.
      window.location.reload();
    } else {
      console.warn(
        "[HMR] Root or manually mounted instance modified. Full reload required."
      );
    }
  }

  // 5. make sure to cleanup dirty hmr components after update
  queuePostFlushCb(() => {
    for (const instance of instances) {
      hmrDirtyComponents.delete(
        normalizeClassComponent(instance.type as HMRComponent)
      );
    }
  });
}
说实话,reload我也没有看的太懂,但知道大概意思就是如果要全量更新的话,尝试一下对整个组件树进行更新,如果条件不合适,则会走window.reload的兜底逻辑,不过对于整体流程的分析来说也不是特别重要,有读者了解的话,可以联系我进行补充。
至此,我们看起来似乎已经明白了组件侧是怎么样完成热更新这一操作的了,但是,似乎我们忽略了一个最重要的点,这些需要更新的module的信息来源于哪儿呢?
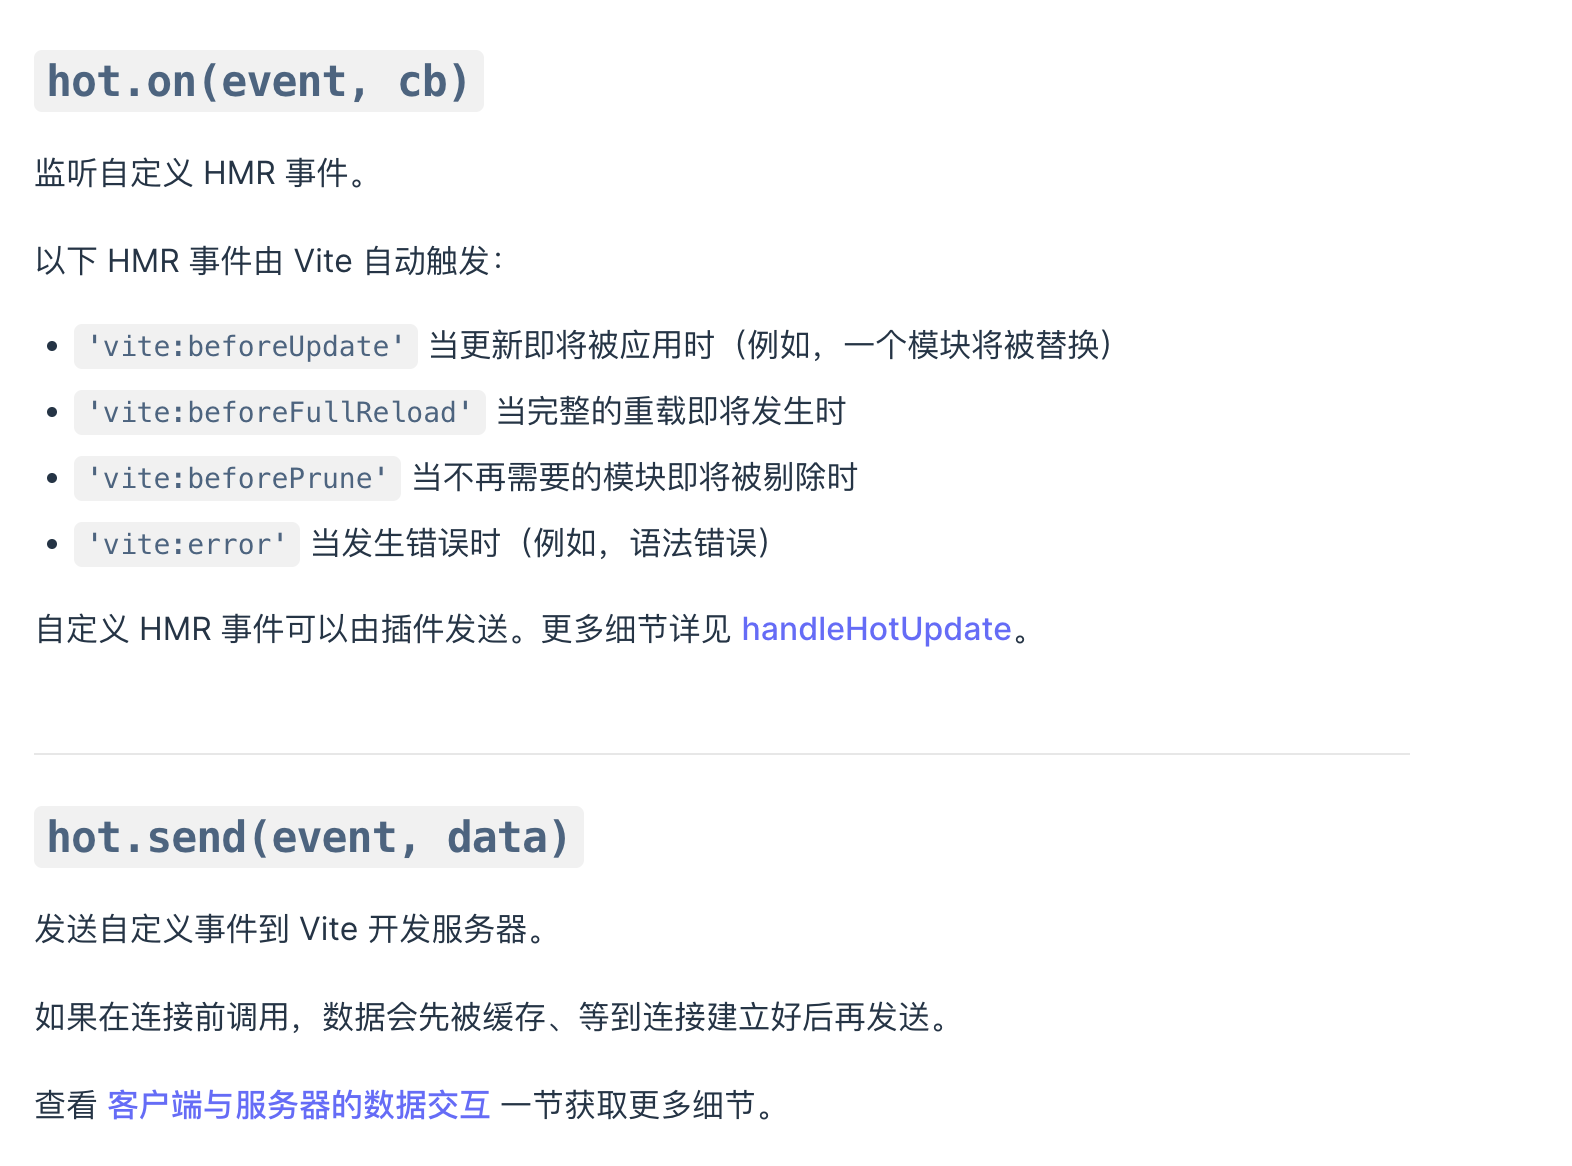
有点儿一头雾水,不知道从什么地方开始分析,那要不先看一下vite的文档,热更新相关的文档 (opens new window)
在这儿,我们已经看到了之前我们看到过的这个import.meta.hot的 API 了,看起来方向是对了,以下是vite文档上的 demo。
export const count = 1;
if (import.meta.hot) {
  import.meta.hot.accept((newModule) => {
    if (newModule) {
      // newModule is undefined when SyntaxError happened
      console.log("updated: count is now ", newModule.count);
    }
  });
}
但是,别高兴的太早,往往会捡了芝麻丢了西瓜。
留意一下这两个 API,它是一会儿我们分析问题的线索

另外,再看一下vite独有的一个钩子,对我们来说,一会儿对分析问题还有用,文档 (opens new window)。
interface HmrContext {
  file: string;
  timestamp: number;
  modules: Array<ModuleNode>;
  read: () => string | Promise<string>;
  server: ViteDevServer;
}
至此看起来,好像线索一下断了,好吧,那我们只好来修改一下组件,触发一个热更新。

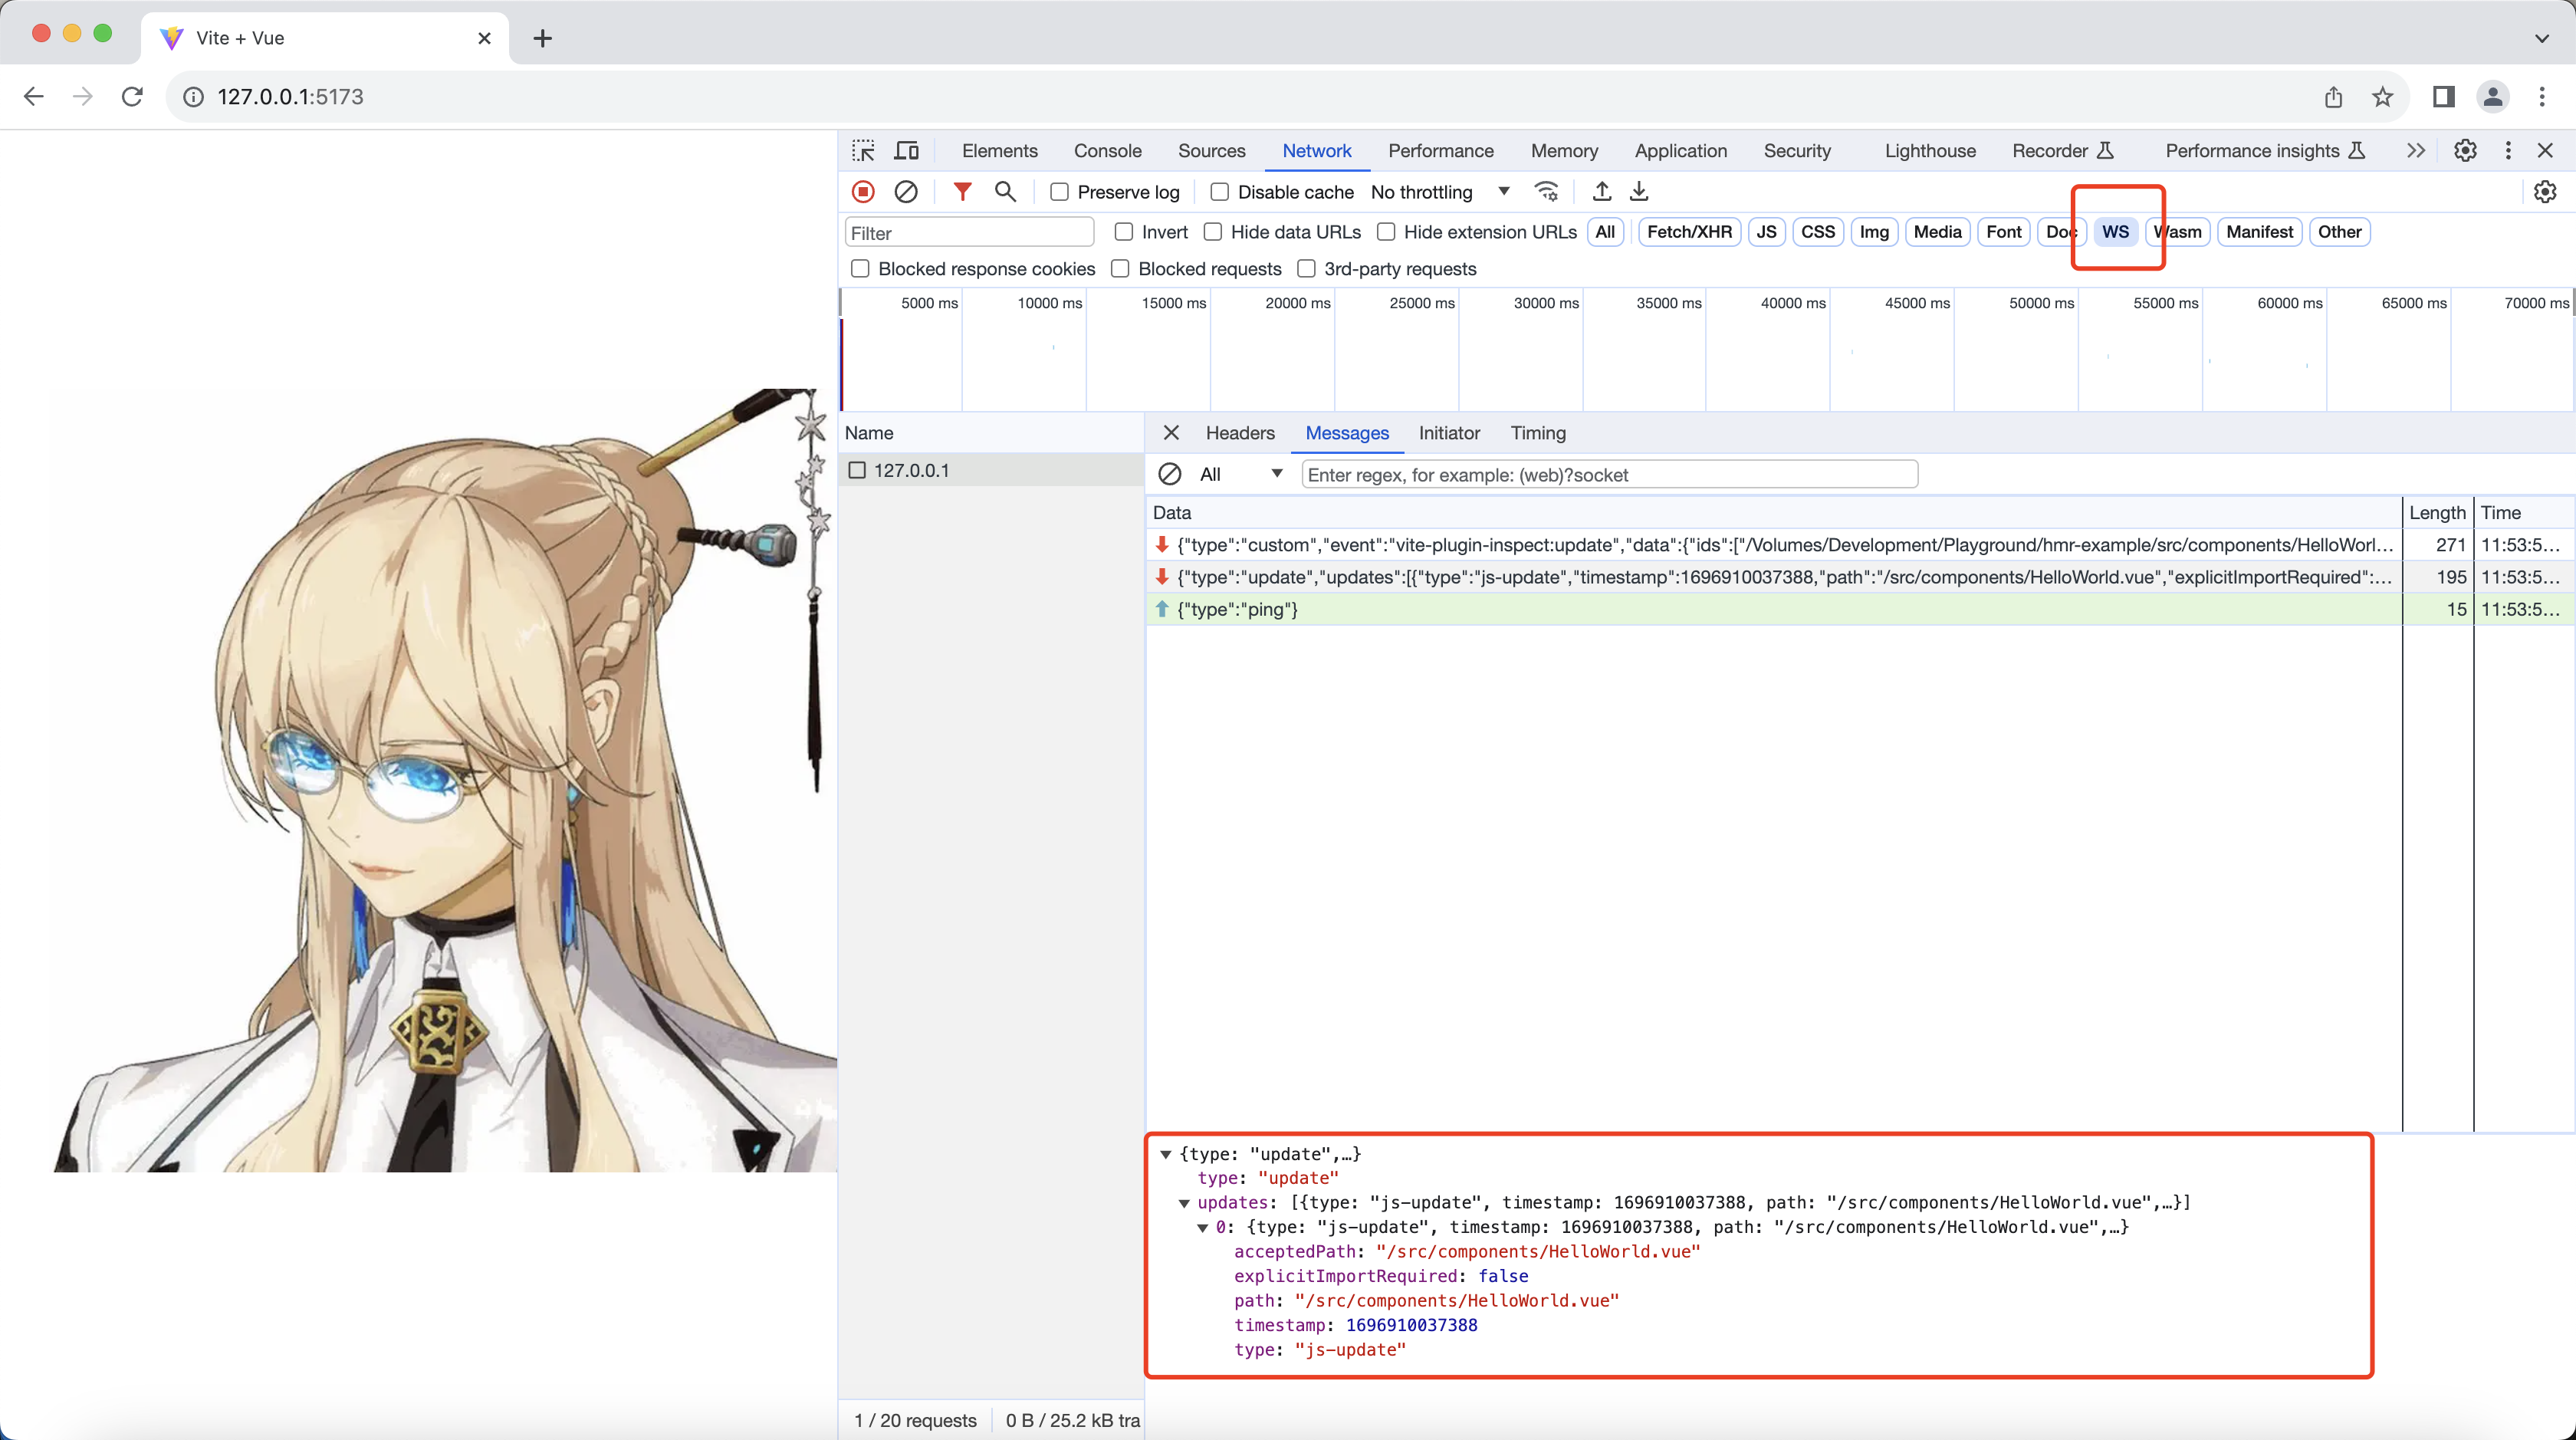
这儿一定要用Chrome,并且要用ip访问,否则,你可能看不到这个WS
新的线索已经出来了,到vite的源码中去寻找它处理WebSocket相关的逻辑。
WebSocket Server 相关的源码 (opens new window)
在 HMR 的源码附近,第 144 行到 216 行,我们找到了刚才发送WS信息到浏览器的代码。
为了方便您的阅读,我节选了以下代码:
export function updateModules(
  file: string,
  modules: ModuleNode[],
  timestamp: number,
  { config, ws, moduleGraph }: ViteDevServer,
  afterInvalidation?: boolean
): void {
  const updates: Update[] = [];
  const invalidatedModules = new Set<ModuleNode>();
  const traversedModules = new Set<ModuleNode>();
  let needFullReload = false;

  for (const mod of modules) {
    const boundaries: { boundary: ModuleNode; acceptedVia: ModuleNode }[] = [];
    const hasDeadEnd = propagateUpdate(mod, traversedModules, boundaries);
    //-----------删除了一些不相关的代码----------------
    updates.push(
      ...boundaries.map(({ boundary, acceptedVia }) => ({
        type: `${boundary.type}-update` as const,
        timestamp,
        path: normalizeHmrUrl(boundary.url),
        explicitImportRequired:
          boundary.type === "js"
            ? isExplicitImportRequired(acceptedVia.url)
            : undefined,
        acceptedPath: normalizeHmrUrl(acceptedVia.url),
      }))
    );
  }

  ws.send({
    type: "update",
    updates,
  });
}
上述代码完成的逻辑是,调用者告诉它什么文件发生了变更,然后对浏览器客户端主动推送更新事件。
这个事件被谁处理了呢?我们首先第一猜测看看@vitejs/vue-plugin里面有没有处理,但是搜索了一大圈,发现没有任何处理逻辑,那么,处理逻辑一定在vite内部,按直觉猜测,应该是client相关的目录,尝试找一下。
首先找到client的处理代码,源码在这儿 (opens new window),我们通过看上图捕获的那个WS数据结构,找一两个关键字,比如acceptedPath嘛,就可以定位到第 433 行。
async function fetchUpdate({
  path,
  acceptedPath,
  timestamp,
  explicitImportRequired,
}: Update) {
  const mod = hotModulesMap.get(path);
  if (!mod) {
    // In a code-splitting project,
    // it is common that the hot-updating module is not loaded yet.
    // https://github.com/vitejs/vite/issues/721
    return;
  }

  let fetchedModule: ModuleNamespace | undefined;
  const isSelfUpdate = path === acceptedPath;

  // determine the qualified callbacks before we re-import the modules
  const qualifiedCallbacks = mod.callbacks.filter(({ deps }) =>
    deps.includes(acceptedPath)
  );

  if (isSelfUpdate || qualifiedCallbacks.length > 0) {
    const disposer = disposeMap.get(acceptedPath);
    if (disposer) await disposer(dataMap.get(acceptedPath));
    const [acceptedPathWithoutQuery, query] = acceptedPath.split(`?`);
    try {
      fetchedModule = await import(
        /* @vite-ignore */
        base +
          acceptedPathWithoutQuery.slice(1) +
          `?${explicitImportRequired ? "import&" : ""}t=${timestamp}${
            query ? `&${query}` : ""
          }`
      );
    } catch (e) {
      warnFailedFetch(e, acceptedPath);
    }
  }

  return () => {
    for (const { deps, fn } of qualifiedCallbacks) {
      fn(deps.map((dep) => (dep === acceptedPath ? fetchedModule : undefined)));
    }
    const loggedPath = isSelfUpdate ? path : `${acceptedPath} via ${path}`;
    console.debug(`[vite] hot updated: ${loggedPath}`);
  };
}
上述这段代码,客户端通过拿到了服务端推送过来的文件变更信息,然后vite通过重新import了一下资源,体现在浏览器的行为上,当然是发起一个新的资源请求啦。

虽然我们已经分析到了这个位置,但是文件的变更vite是怎么知道的呢?
我们问一下chatgpt在nodejs中监听文件变化主要有哪些包可以用。chatgpt给了我几个答案,有nodemon,chokidar等。
在vite的源码的package.json里面搜,能搜到chokidar,毫无疑问,它就是监听文件变化的突破口了,在vite的源码里面搜一下chokidar。
为了方便你的阅读,我节选了以下代码:
watcher.on("change", async (file) => {
  file = normalizePath(file);
  // invalidate module graph cache on file change
  moduleGraph.onFileChange(file);

  await onHMRUpdate(file, false);
});

watcher.on("add", onFileAddUnlink);
watcher.on("unlink", onFileAddUnlink);
我们一眼就看到了onHMRUpdate,真是幸运啊,哈哈哈。上述代码监听到文件变化,立刻通知HMR处理模块处理变化了的文件。
这个方法调用了之前我们前文已经关注的一个hmr.ts文件定义的处理逻辑,源码 (opens new window)
为了方便你阅读,我摘抄了以下代码:
export async function handleHMRUpdate(
  file: string,
  server: ViteDevServer,
  configOnly: boolean
): Promise<void> {
  const { ws, config, moduleGraph } = server;
  const shortFile = getShortName(file, config.root);
  const fileName = path.basename(file);

  const isConfig = file === config.configFile;
  const isConfigDependency = config.configFileDependencies.some(
    (name) => file === name
  );

  const isEnv =
    config.inlineConfig.envFile !== false &&
    getEnvFilesForMode(config.mode).includes(fileName);
  if (isConfig || isConfigDependency || isEnv) {
    // auto restart server
    debugHmr?.(`[config change] ${colors.dim(shortFile)}`);
    config.logger.info(
      colors.green(
        `${path.relative(process.cwd(), file)} changed, restarting server...`
      ),
      { clear: true, timestamp: true }
    );
    try {
      await server.restart();
    } catch (e) {
      config.logger.error(colors.red(e));
    }
    return;
  }

  if (configOnly) {
    return;
  }

  debugHmr?.(`[file change] ${colors.dim(shortFile)}`);

  // (dev only) the client itself cannot be hot updated.
  if (file.startsWith(withTrailingSlash(normalizedClientDir))) {
    ws.send({
      type: "full-reload",
      path: "*",
    });
    return;
  }

  const mods = moduleGraph.getModulesByFile(file);

  // check if any plugin wants to perform custom HMR handling
  const timestamp = Date.now();
  const hmrContext: HmrContext = {
    file,
    timestamp,
    modules: mods ? [...mods] : [],
    read: () => readModifiedFile(file),
    server,
  };

  for (const hook of config.getSortedPluginHooks("handleHotUpdate")) {
    const filteredModules = await hook(hmrContext);
    if (filteredModules) {
      hmrContext.modules = filteredModules;
    }
  }

  if (!hmrContext.modules.length) {
    // html file cannot be hot updated
    if (file.endsWith(".html")) {
      config.logger.info(colors.green(`page reload `) + colors.dim(shortFile), {
        clear: true,
        timestamp: true,
      });
      ws.send({
        type: "full-reload",
        path: config.server.middlewareMode
          ? "*"
          : "/" + normalizePath(path.relative(config.root, file)),
      });
    } else {
      // loaded but not in the module graph, probably not js
      debugHmr?.(`[no modules matched] ${colors.dim(shortFile)}`);
    }
    return;
  }

  updateModules(shortFile, hmrContext.modules, timestamp, server);
}
这段代码里面,告诉了HMR模块文件变化的来源,同时也解释了为何vite的配置文件也支持热重载,另外还触发了vite插件的钩子handleHotUpdate
至此,我们其实已经完全搞懂了vite环境下HMR的全过程,接下来,对上述这一套流程来一个全面的总结。
# 4、HMR 处理流程总结
先决条件是假设现在vite的devServer已经正常启动,WebSocket也已经和客户端进行了连接。
1、
@vitejs/vue-plugin转义vue文件,不仅处理了template,script,style,同时注入了与vite匹配的热更新逻辑,vite的Client同时已经注入了一个和HMR相关的API(import.meta.hot),template被编译成了一个render函数,render函数执行,得到渲染的内容,此刻vue文件上被@vitejs/vue-plugin注入的逻辑是一个设置的一个监听,等待文件变化的时机触发。2、当我们修改项目文件的时候,
vite的Server端通过nodejs的能力(chokidar)监听到项目文件目录的变化。3、
vite的Server端通过WebSocket向Client端发送文件变化的报文。4、
vite的Client解析到WS报文,确定文件更新的范围,重新向vite的Server端发送资源请求,变动的资源此刻已经被@vitejs/vue-plugin转义成了更新之后的render函数。5、
vue的__DEV__环境下提供的rerender函数,它将这个组件的旧的render函数替换成新的render函数,执行更新逻辑,完成更新。
上述过程我只研究了vue文件中template的更新逻辑,如果你有兴趣的话,可以尝试再研究一下它是怎么处理样式的更新的。